
Sanitize vs. Disinfect vs. Clean: What’s the Difference?
How can you tell if you're using the right products to keep germs at bay? Learn about the difference between sanitizing and disinfecting from our team at Grove.
Read More


Last Updated: September 14, 2022
The kitchen gets grimy fast, and when life (or Netflix) gets in the way of routine daily cleaning, the task can go from doable to daunting in no time. No matter when you get to it, this quick-and-dirty guide helps you get it done in just 10 steps.

There’s a reason why the kitchen is usually first on the list of rooms in bad need of a deep-clean. Since most of the stuff in there ends up in close contact with your mouth in one way or another, it makes sense you’d want it to be the cleanest room in the house.
The good news is that even if you’re a bona fide germaphobe, you don’t need powerful, toxic chemical cleaners to get your kitchen insanely clean. The American Lung Association wants you to stop using conventional cleaners and make the switch to natural cleaners, which are just as effective.
This 10-step guide to cleaning the kitchen is all about getting it clean enough to pass a Health Department inspection — but in a way that doesn’t require a hazmat suit.

Before you get cleaning, gather the supplies you’ll use. Choose what suits you best — here are a few recommendations:

To really get a deep clean going, things need to be at least somewhat orderly, so first, do away with the clutter. Put everything that doesn’t belong in the kitchen at all in a box or bag, and set it in another room to deal with later. Then, put everything that does belong in the kitchen in its place — including putting all of the dirty dishes in (or next to) the sink.
Gather up dirty rugs, dish rags, aprons, and towels, and get a load of laundry going — wash the rugs separately from the towels.
Tackle those dishes! You can’t properly clean if you can’t use the sink, so wash, dry, and put away all of the dishes. If you have a dishwasher, fill it, and move on to the next step while it runs.
Take a look around, and appreciate how much better your kitchen looks after just the first step!

Top to bottom is the right way to dust any room, unless you want dust from up high floating down and landing all over everything you just dusted down low.
Up high: Dust the light fixtures, tops of cupboards, tops of shelves, and the top of the fridge.
In the middle: Dust windows and sills, tables, shelves, and the like.
Down low: Dust the baseboards, then sweep or dust mop the floor to remove the worst of the accumulated debris from the floor so you don’t track it everywhere while you’re cleaning.
After you dust, follow up with a damp microfiber cloth to remove stuck-on grease and grime from those same surfaces. Why microfiber, you ask? It removes most dirt, grease, grime, and bacteria from a surface with zero cleaners needed. Read more about cleaning with microfiber, including how it works and its pros and cons.
If your kitchen is overrun with small appliances, just cleaning those alone can be quite the lengthy task. If your appliances are stainless steel, check out our stainless steel cleaning guide to get the fronts extra-shiny.
Here’s a quick rundown on how to clean your trusty food makers — along with links to our comprehensive cleaning guides:
Place a bowl with a few lemon slices in the microwave, and run it on high for four minutes. Leave the door closed for an hour, then open it up and wipe the grime right up.
Use the auto-clean button to clean the coffee maker with 1:1 vinegar:water. No auto-clean? Brew a couple of pots with 1:1 vinegar:water. Scrub the basket and the pot.
To clean the toaster oven, sift or vacuum out the burnt bits from the bottom. Wipe the inside with a damp microfiber cloth. Don’t touch the heating elements, which are easily damaged.
To clean your juicer, add a little mild dish soap to a sinkful of warm water. Disassemble the juicer, soak the components for 10 minutes, then wash and dry thoroughly.
Clean your instant pot by disassembling and soaking the pieces in soapy water. Wipe down the base and inside with a damp microfiber cloth. Wash and dry the pieces, then reassemble.
Disassemble your fryer and soak the pieces. Use a non-abrasive sponge to remove stuck-on food. Clean the air fryer base with a damp microfiber cloth, wash the parts, and reassemble.

To clean the countertops, clear them of all items, and use an all-purpose cleaner to wipe them down.
Before you put each item back in its countertop spot, wipe it down with a warm, damp microfiber cloth.
To clean the kitchen cabinets, remove the contents, tossing old and expired items as you go. Clean the inside of the cabinet with an all-purpose cleaner, then wipe down and replace the items that go back in.
To clean the pantry, remove all items, tossing, composting, or recycling as you go. Wipe down the shelves, sweep and mop the floor, and replace everything after wiping down each item.

To clean the stove burners and metal grills on a gas stove, soak them in lukewarm water and a splurt of dish soap. For electric stovetop burners, gently spot-clean dirty areas with soap and a microfiber cloth, avoiding the connection points. To clean a glass stovetop, wipe it thoroughly with a microfiber cloth and water or vinegar, then go over it with a microfiber glass-cleaning cloth.
Following our helpful, step-by-step oven-cleaning guide, mix half a cup of baking soda with 2 to 3 tablespoons of water to create a paste. Use the paste and a gentle scrub brush to scour the oven interior, avoiding elements. Let the paste sit overnight, then use a microfiber cloth, water, and distilled white vinegar to remove the baking soda and give it a final shine.

Your sink gets gross fast, but the garbage disposal and drain get slimy, grimy and moldy practically overnight.
Use a baking soda-and-water paste and a sponge or microfiber cloth to wipe down the entire sink basin, and use an old toothbrush coated in the paste to scrub as much of the drain area as you can reach. Spray distilled white vinegar over the baking soda, which will fizz up and loosen any stubborn gunk. Let it sit for a few minutes, scrub, then rinse with water, and presto! Clean sink!
To naturally clean your drain, pour in a half-cup of baking soda, followed by a half-cup of vinegar. Put the plug in the drain, and leave it for an hour. Pull the plug, and pour a pot of boiling water down the drain.

Ah, one of the most-dreaded kitchen-cleaning tasks: cleaning out the fridge.
Start by emptying everything out of your fridge. Toss or compost anything that looks like a failed lab experiment or that’s expired. Put the edible contents on your now-empty countertops.
Pull out the removable trays, drawers, and shelves, and soak them in warm, soapy water.
Use a hot, damp microfiber cloth to clean the inside of the fridge and door. While they air-dry, wash the shelves and drawers in hot, soapy water, rinse thoroughly, dry, and replace.
Rinse and recycle the containers you emptied out, and wipe down the exterior of the fridge.

While we might dismiss cleaning the sink because it's always soapy, we often forego scrubbing the trash can because it's “always trashy.” Not today, home citizen!
Take out that stinky garbage. Turn the whole can upside down over the outdoor bin to empty any wayward trash. If it’s really gross inside, hose it out — or give it a good, hot shower — while you scrub it with a heavy-duty, bristly brush.
If it’s not that bad, use an all-purpose cleaner to wipe down the interior and exterior of the can — get the lid, hinges, and foot pedal — then put in a new eco-friendly liner, and your trash will stink no more.

Time to vacuum thoroughly — run the hose along the baseboards, behind the fridge, under shelves and cupboards, and in all the cracks and crevices in your kitchen.
Give the floor a good microfiber mopping with the appropriate cleaner for your floor type. Our hardwood floor cleaning guide will help you get rid of grime on your wood floors without damaging your finish.
If your tile grout needs some TLC, follow the easy steps and helpful tips in our grout-cleaning guide to restore it to its original glory.

Now that your kitchen is sparkly clean from top to bottom, you can put your clean rugs back down and fill the drawers with fresh dish towels. Ahhh, now that feels good!
Make a list of items you’re running low on, and use your reserves to stock kitchen essentials like reusable paper towels, recycled aluminum foil, coffee filters, and sandwich bags. Give the kitchen one last look-around to make sure you got it all. Tie up any loose ends, and put your tools and cleaners away.
Now, it’s time to stand back, crack open a can of something cold and fizzy, and admire your handiwork. You did it! Bask in the satisfaction of spotless stainless steel, gleaming glass, and a flawless floor — and enjoy it while it lasts.
Looking for more cleaning how-tos and other sustainable swaps you can make at home? Grove has you covered. From timely topics such as our handwashing and hand sanitizer breakdown to evergreen primers like our simple ways to reduce your plastic use at home, our handy guides are here to answer your most pressing questions. And let us know how if you have any cleaning questions (or share your own tips using #grovehome) by following Grove Collaborative on Instagram, Facebook, Twitter, and Pinterest.
If you're ready to take on germs, shop Grove Collaborative's cleaning essentials for the cleaning tools to tackle the job.
How can you tell if you're using the right products to keep germs at bay? Learn about the difference between sanitizing and disinfecting from our team at Grove.
Need a quick refresher on how long those leftovers are safe to eat? Keep reading to learn more about the right ways to store leftovers and the best food storage options for food freshness and convenience.

Grove writer, Carly Reynolds, discovered three durable and sustainable food storage solutions that will help you minimize waste while maintaining convenience. But which one was her favorite?
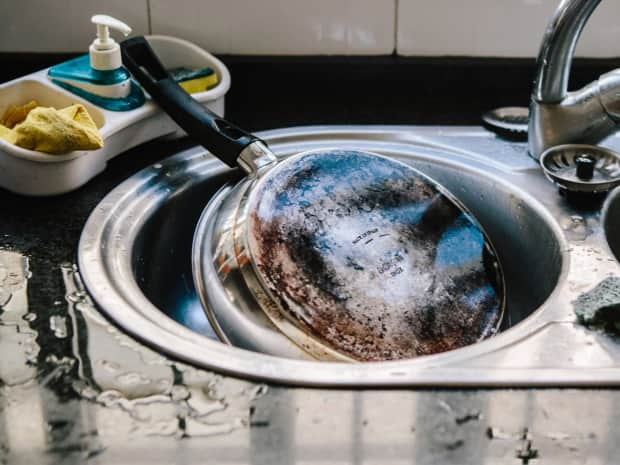
Never Google “how to get burnt pans” again. Grove writer Mackenzie Sanford tried grab green Cookware and Bakeware Cleaning Pods on a few tough culinary messes, and she’s here to tell you all about it — with pictures!