5 Ways to Make Your Bedroom More Eco-Friendly
Make your bedroom an earth-friendly haven with our five easy and sustainable tips, plus examples of eco-friendly products.
Read More


Last Updated: August 22, 2022
A messy bedroom boosts anxiety and makes it tough to find your favorite pants or your other shoe. It can even interfere with your sleep — and that’s no good for your wellbeing. Get your sacred space spic 'n' span from tip to toe in just 8 easy steps.
Your bedroom is your sanctuary — a safe space to go at the end of the day to rest, recharge, and heal thyself. A clean and clutter-free bedroom promotes better focus, increased productivity, and better sleep — after all, a cluttered room is a cluttered mind, and a cluttered mind isn’t going to fall asleep easily.
Any time is a good time to deep-clean your bedroom — and it’s a great time to go green by switching to natural cleaning products that won’t introduce toxic chemicals into the air you breathe all night. So gather up your favorite natural cleaners, roll up your sleeves, and get to work making your bedroom feel like your special, refreshing hideaway again.

Cleaning your bedroom without using harmful cleaning products is easy. Here are a few cleaning essentials to get your bedroom clean as a whistle — naturally.

Start your bedroom-cleaning odyssey with the very basics. First, gather up all the cups of stale water, half-empty cans of La Croix, and late-night snack bowls you’ve accumulated, and take them to the kitchen.
Toss out your bedroom trash, put your dirty clothes in the laundry bin, and hang anything that’s clean. Put any other out-of-place items back in their forever spots. Now you’re ready to get down and dirty!
Dusting the stuff that’s easiest first might seem like the path of least resistance, but it actually means that all the dust from your ceiling fan is going to cover the dresser you just wiped down. Start from the top, and work your way down for the best results. Grab your long-handled duster, and hit the ceiling fan, ceiling and corners, and light fixtures first, then the windows, night stand, dresser, and whatever other furniture you have. Don’t forget to dust your (fake?) plants!

After you’ve dusted, take a damp microfiber cloth and your all-purpose cleaning spray to surfaces that see a lot of use, like night tables, the dresser, and your bookcases or shelves. Wipe off any spills, stains, or sticky spots the duster didn’t take care of, and scrape off hardened candle wax with a blade. Scrub your door handles and the places on your doors you touch the most — these areas are prone to a build-up of dirt and oils that make them look grimy over time. They’re also probably rife with bacteria. Your baseboards are another place that gathers dirt, dust, and dead skin like no one’s business, so give ‘em a little microfiber love before you move on.
Sheets get mightily gross with all your dead skin and body fluids, so wash your sheets and pillowcases at least every two weeks. Follow our comprehensive sheet-washing guide for step-by-step directions. Then, check out our guide to washing blankets, and get those clean, too.
A comforter is bulkier than your bedsheets and takes a bit more finessing to get it really clean. Check the tag for fabric care instructions, then read up on how to wash your down comforter for step-by-step directions for getting yours super fresh and cozy again.
Wondering if you can wash your memory foam pillows or down pillows? You can—and you should, every six to 12 months. Surprisingly, down and memory foam pillows are generally machine washable and dryable, and also surprisingly, it’s not rocket science.
You’ve probably heard by now that humans spend a third of our lives sleeping, which means you spend about six to ten hours on your mattress every day. That’s a lot of time for sweat, dust, drool, dead skin cells, and bacteria to seep into your cushy mattress, where millions of dust mites feed on each night’s bounty.
Clean your mattress every 6 to 12 months. Vacuum it first, then sprinkle the whole thing liberally with baking soda. Let it sit for a few hours to soak up moisture and odors. Vacuum again, and if it’s time, flip and rotate the mattress.

Now that all the dust from your ceiling fan and the crumbs from your nightstand and bed sheets are on the floor, it’s time to vacuum them up. Don’t just vacuum the floor you can see — suck out all of the dust and detritus that’s accumulated in the nooks and crannies of your bedroom, too — like the insides of your dresser drawers or nightstand, your windows frames, and between the window and the screen. Dust bunnies love to reproduce in small, dark places like under your bed, dresser, and bookcase, so scoot your furniture out of the way, and give those oft-neglected areas some attention, too. Then, attach the upholstery brush and vacuum your curtains.
GROVE TIP
Vacuum cleaners with a HEPA (high efficiency particulate air) filter remove particles from your air, including allergens like dust mite parts and droppings, mold spores, and pollen. If yours doesn’t have one, choose a HEPA-filter vacuum cleaner when it’s time to replace it. In the meantime, read up on air purifiers, and consider using one to remove contaminants from the air in your bedroom.

Say sayonara to the streaks and smudges that have gathered on your windows, and let the sun shine in unimpeded. Cleaning the glass doesn’t have to be streaky business. Use a microfiber cloth, which is less likely to streak than other types of fabric.
Follow the same process for your mirrors, and if you’re looking to score some extra points with the cleaning gods, tackle your glass picture frames and light fixtures as well.
There’s nothing quite as satisfying as hopping into a bed with soft, clean sheets. After you’re done cleaning your bedroom, grab your freshly laundered bedding, and make the bed. Pro tip: It’s always a good idea to have a backup set of bed linens for those days when you’re doing a deep clean and your regular set of sheets or comforter aren’t out of the dryer by the time you’re ready to hit the sack.

You only have to go as crazy here as you want to. If your closet is in pretty good shape, just make sure your clothes are hanging properly in the right place and in the right direction. Organize your shoes, and straighten up anything that’s gone topsy-turvy.
If your closet is a disaster in need of an overhaul, fear not. We’ll do this gently:
First, get a couple of boxes or a roll of trash bags, and sort your clothes into three piles: keep, recycle, or donate/sell (here’s how to get your clothes ready to give away.)
Next, put the donate/sell items in one container and the ones you’ll recycle in another. Take them to the donation drop-off or textile recycling facility as soon as you’re done cleaning.
Finally, hang up the items you’re keeping. A good rule of thumb is if you haven’t worn it in at least three months, you probably don’t need it.
Looking for more cleaning how-tos and other sustainable swaps you can make at home? Grove has you covered. From timely topics such as our handwashing and hand sanitizer breakdown to evergreen primers like our simple ways to reduce your plastic use at home, our handy guides are here to answer your most pressing questions. And let us know how if you have any cleaning questions (or share your own tips using #grovehome) by following Grove Collaborative on Instagram, Facebook, Twitter, and Pinterest.
If you're ready to take on germs, shop Grove Collaborative's cleaning essentials for the cleaning tools to tackle the job.

Make your bedroom an earth-friendly haven with our five easy and sustainable tips, plus examples of eco-friendly products.

We all dream about it: the perfect night of sleep. It may seem impossible, but you can make it happen. Experts agree that it all starts with building a basic bedtime routine.

We've pulled the 15 best natural sleep supplements and aids that have been top-rated by Grove members. Select from any on the list and get them delivered to your door!

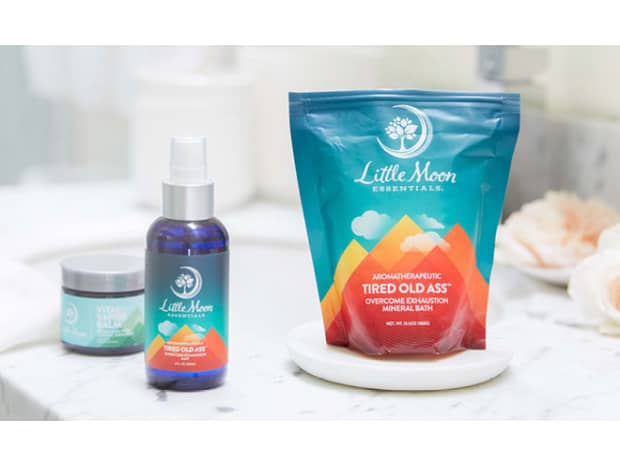
We've pulled the 5 best natural pillow and sleep mists that have been top-rated by Grove members. Select from any on the list and get them delivered to your door!